
I finally had some more time to work on the Star Wars episode one pinball and made some more progress.
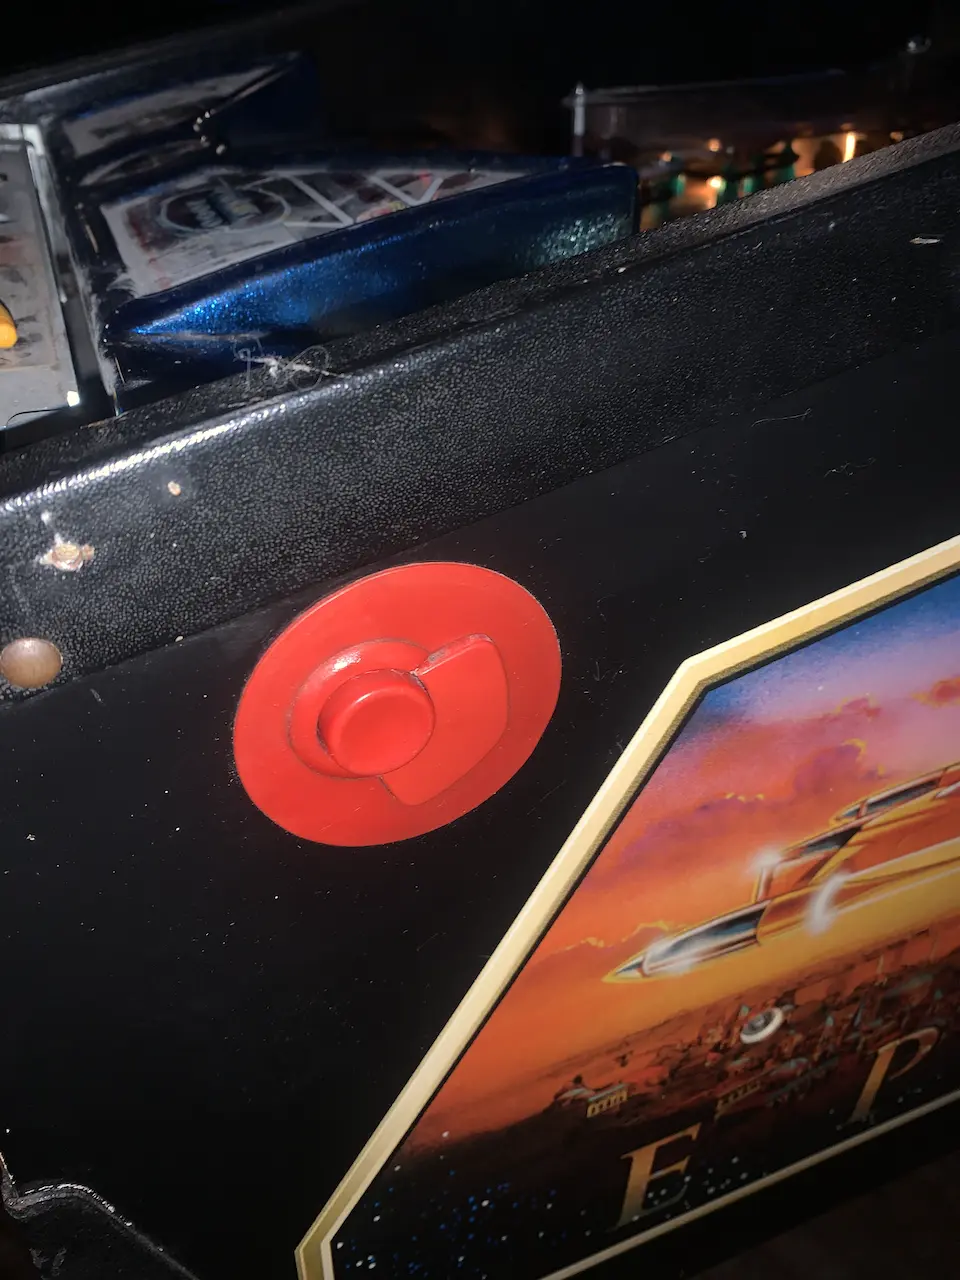
When I last left off with this machine, I had found that the button on the right side of the cabinet was broken off during shipping. The button electronics worked, but the physical button that you press had fallen off.
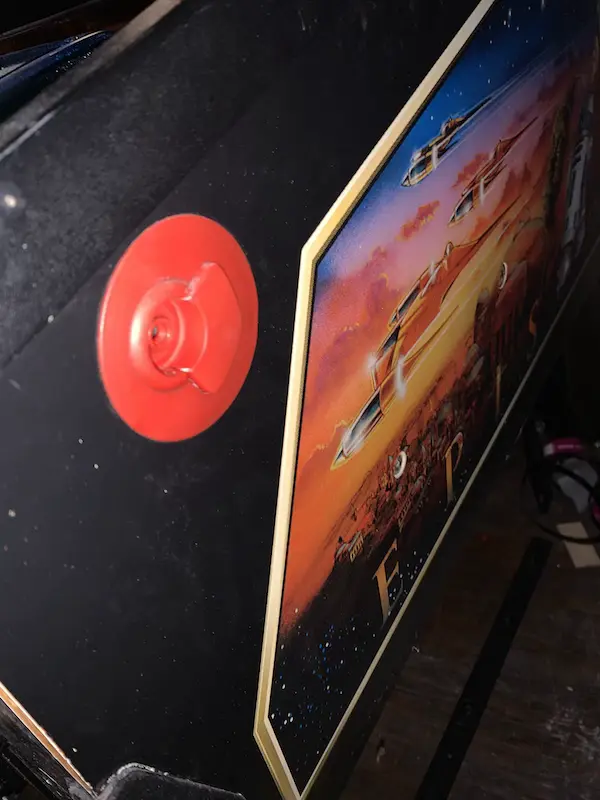
Initially I thought I would be able to fix this using a button from a normal arcade machine, but it turns out this is a proprietary part that is only used on Pinball 2000 machines. I assumed this was going to be expensive and time consuming to fix but it turned out the button wasn't actually missing at all. It was sitting on the floor underneath the machine. I'm not sure how it fell off, but once I re inserted it, the button works great again.
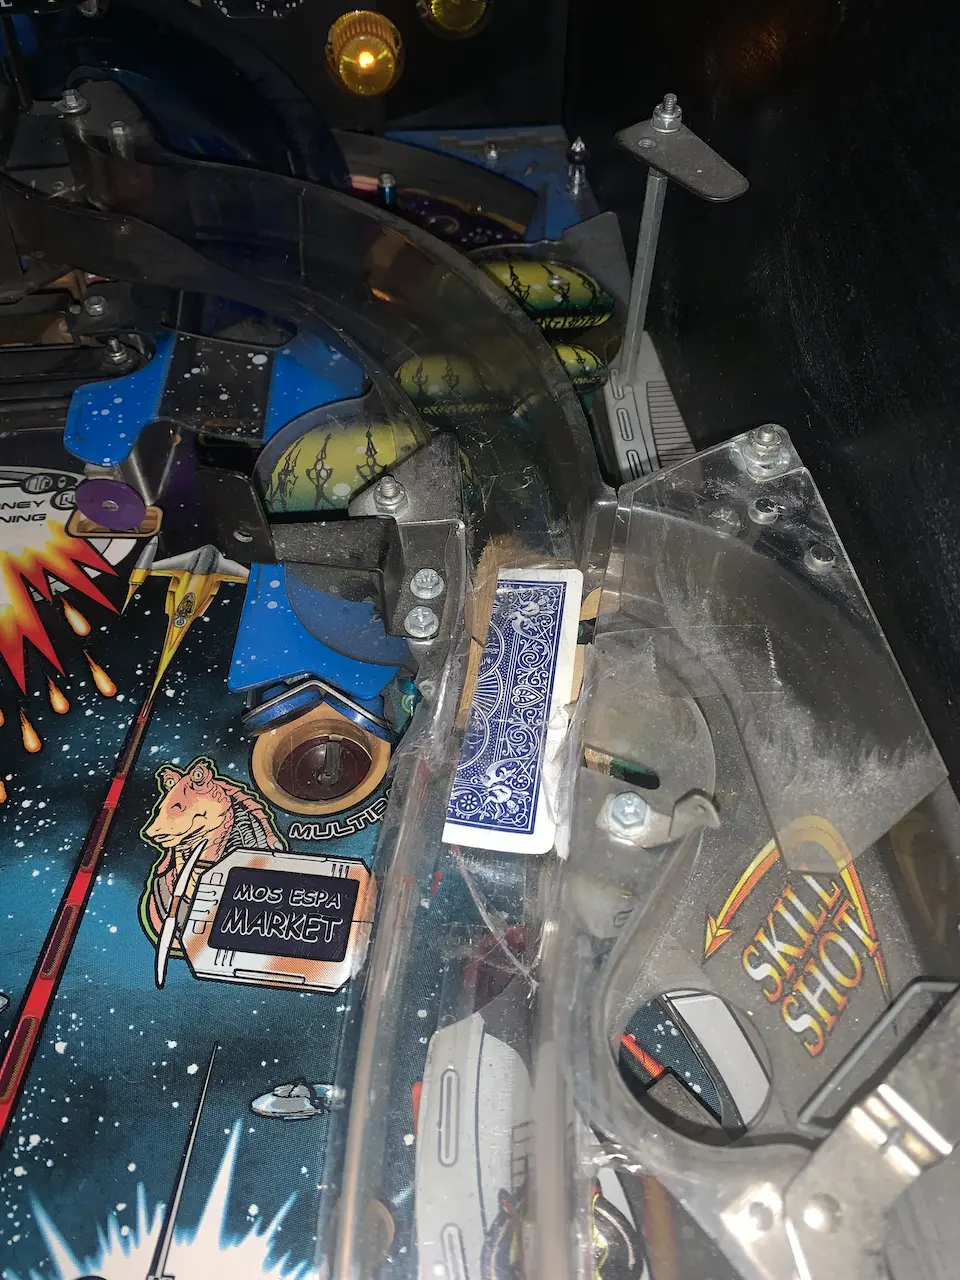
It turns out that one of the ramps on the right side of the machine was broken. I looked online to see if I could find a replacement but didn't have much luck. I'm sure I will be able to find one, but to make the game playable now, I patched the ramp using a wooden shim and a playing card. It ain't pretty but it holds the game together and makes it playable for now.
Now that the game has usable controls, I was able to play a couple of test games to see if everything was working smoothly. but immediately noticed an issue. When the ball hits the front right bumper, a selenoid should fire and propel the ball in the opposite direction, however, the ball collided with this bumper several times and nothing happened.
The machine is still fully playable but the game currently is significantly easier and less fun than it should be.
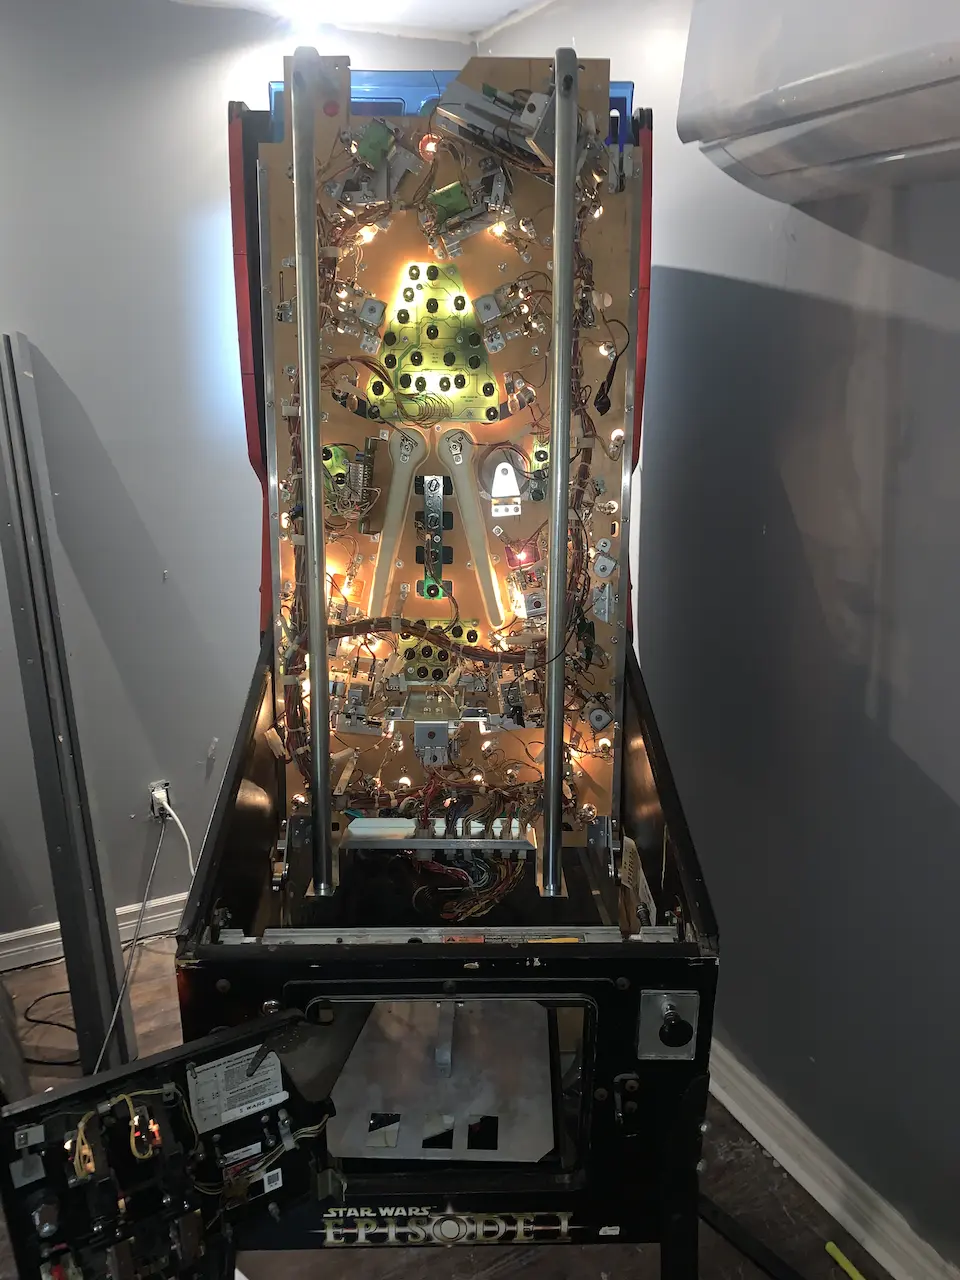
To diagnose what was going on, I was going to need to inspect the wiring of the machine. The playfield of this pinball machines is on rails and you can actually pull it right out of the cabinet for inspection and maintenance. When you are all finished the playfield will slide right back into the machine. Very handy.
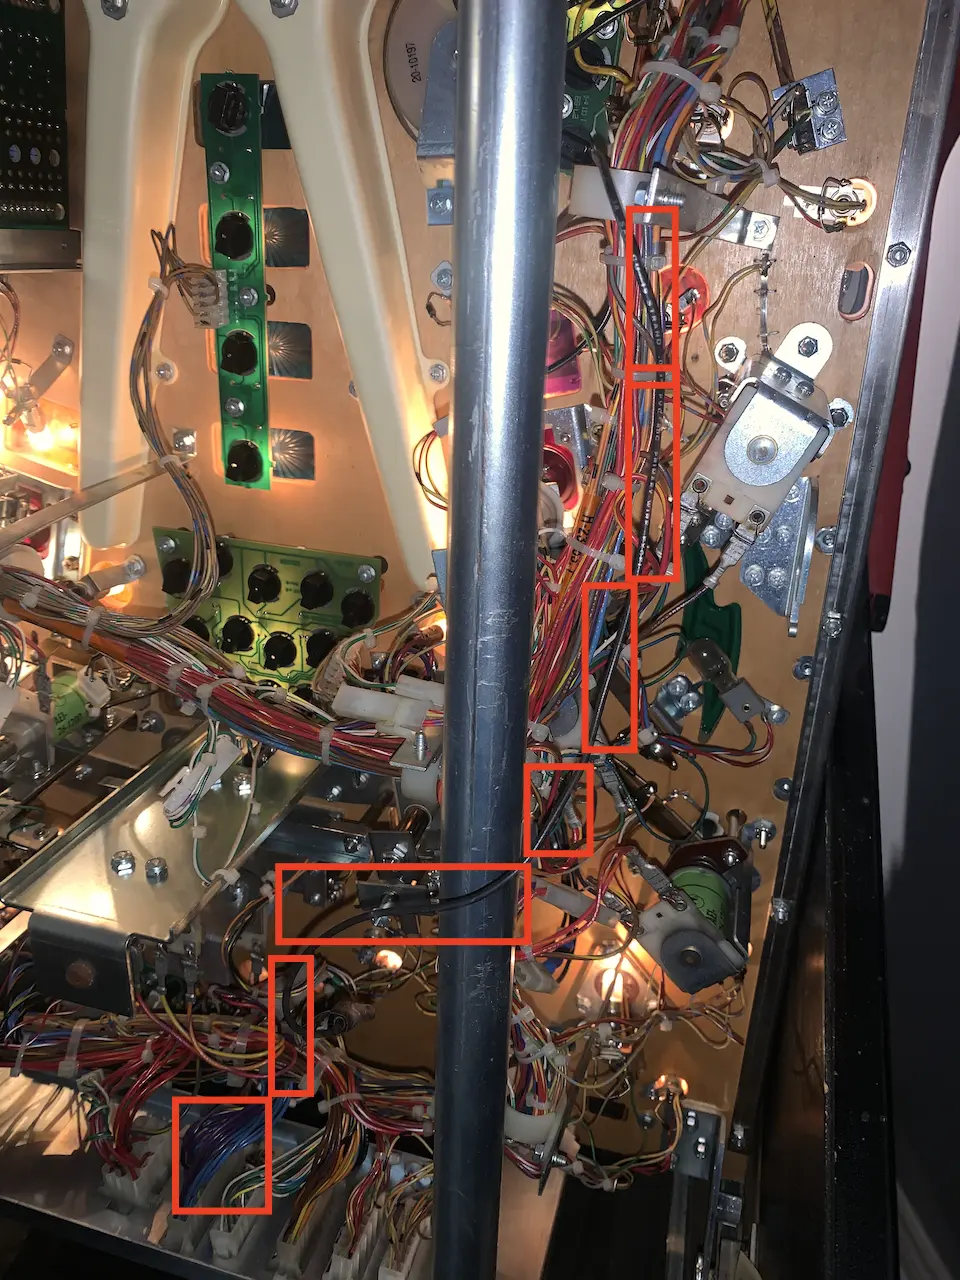
I immediately noticed that there was a long black wire that been damaged and needed to be repaired.
It's sort of hard to see, so i've used my advanced photoshop skills enhance the image
This wire attaches to a connector that also seems to be missing another wire. You can see a pin protruding out of out, indicating that something pulled this previously crimped wire right out of its connector. Judging by the molex connector and the relatively high guage black wire, this missing wire is likely red and delivers power to something in the machine.
I took a quick look at the service manual for this machine and the red/yellow wires are definitely delivering power.
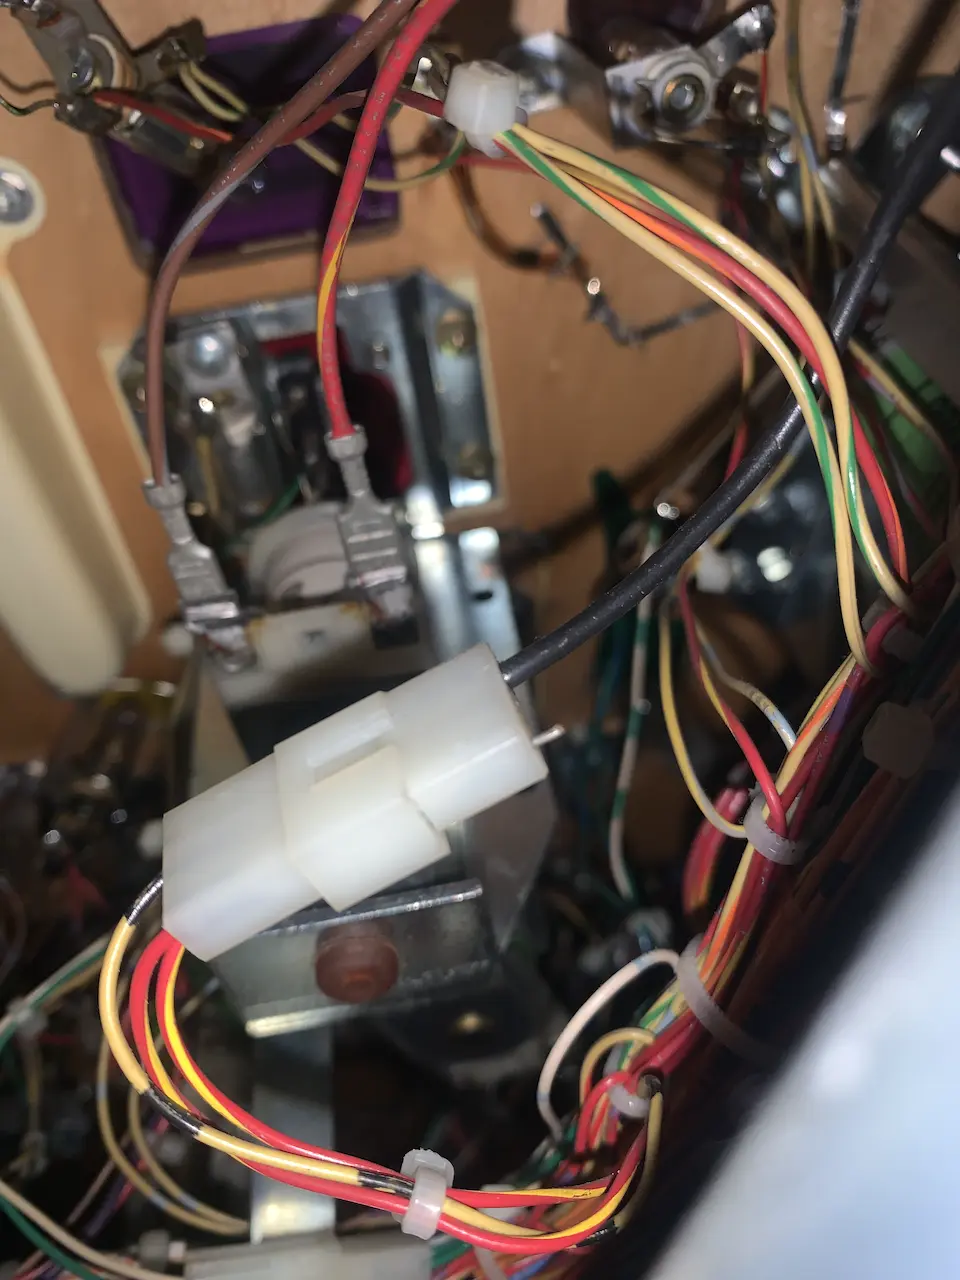
My guess is that these wires have something to do with the light up "lightsaber" prop that overlays the playfield, but since I know for sure that this wire is unrelated to the bumper, i'll just make a note of them for now and keep diagnosing the bumper.
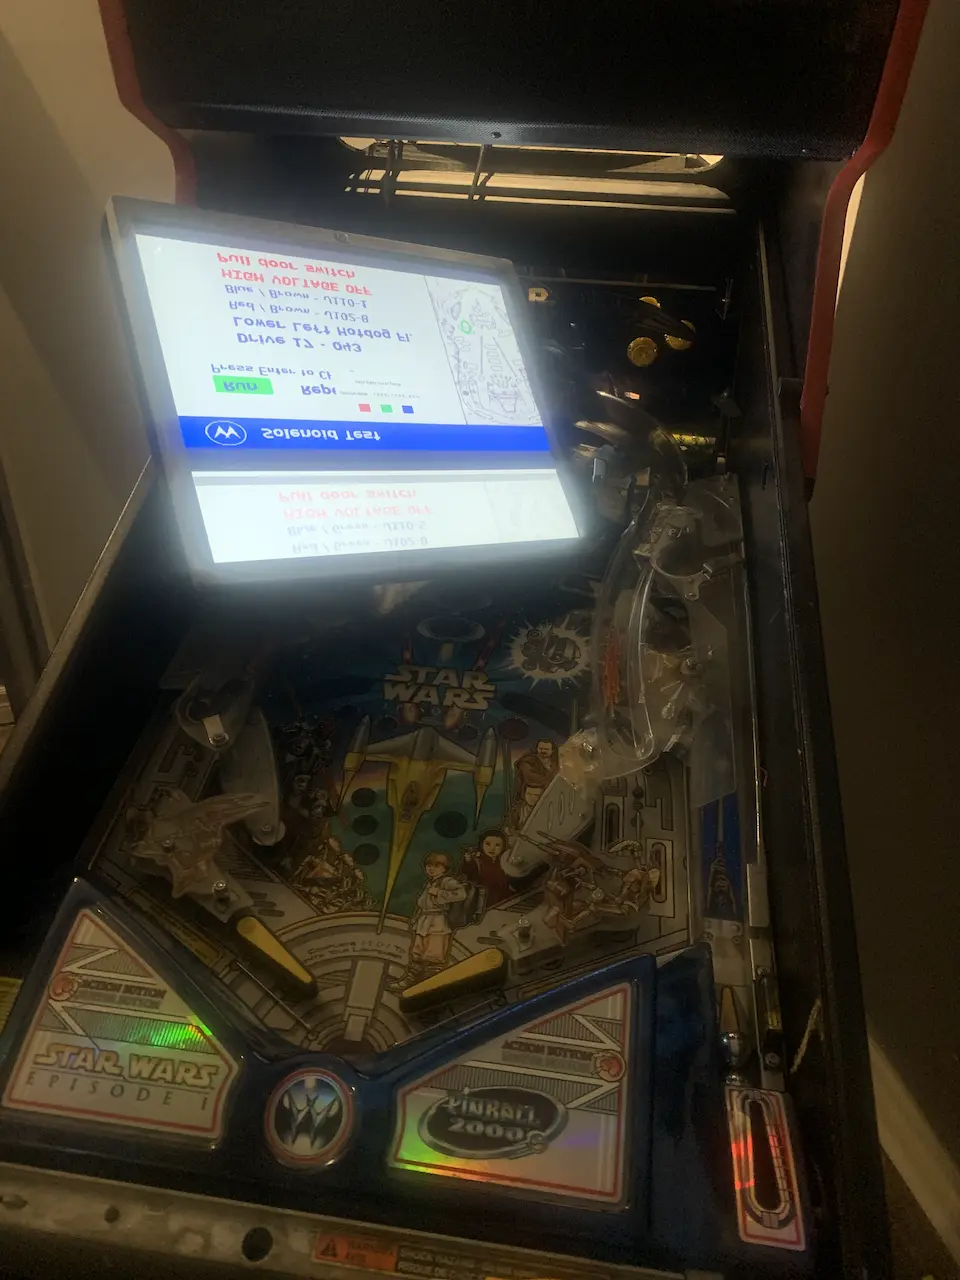
Since this is a newer pinball machine that is essentially just a computer, it actually has a diagnostic mode, similar to what you see in video game arcade machines.
We can use the "selenoid test" of the diagnostic menu to fire the selenoid in the broken bumper without actually playing the game. If the bumper works in the diagnostic menu, when we know that the issue is not an electrical one.
Note that the diagnostic menu is flipped both horizontally and vertically. This is because the screen being shown would
normally be reflected off a piece of glass and would be flipped horizontally. The vertical flip can be fixed using a
special piece of hardware that I will talk about in a future post.
Low and behold, when I fired the selenoid for the bumper in question, it worked perfectly fine. This means that the non working bumper is not an issue with the selenoid and is instead something to do with the switch that fires when the ball hits the bumper.
We can use the the "switch test in the diagnostic menu to confirm this. This test contains a giant grid of squares, each square representing switches that are actuated when the ball rolls over them.
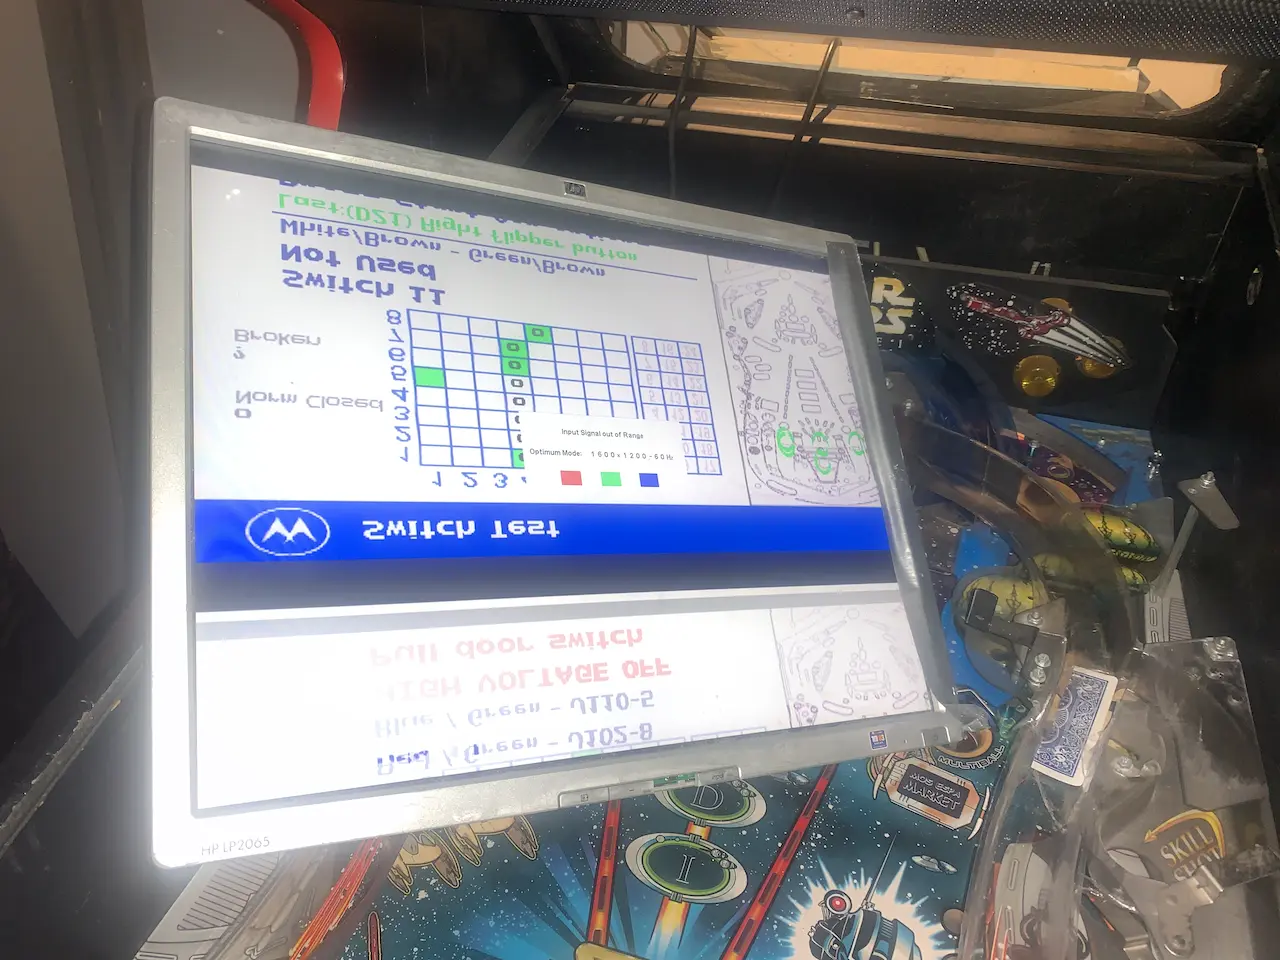
If you remove the glass, you can just press these switches with your fingers to confirm that they work correctly. Interestingly enough, when I press the switch that is supposed to be triggered by the ball, it works perfectly fine.
I tried playing another test game. It seemed as if everything was working but that was short lived. the bumper soon quit yet again.
It turned out that the broken bumper was not an electronics issue.
This is a picture of the rightmost bumper (the one that doesn't work) There is a blue pillar at the bottom of the bumper with an elastic wrapped around it. By only looking at this bumper, nothing really looks out of place at first glance
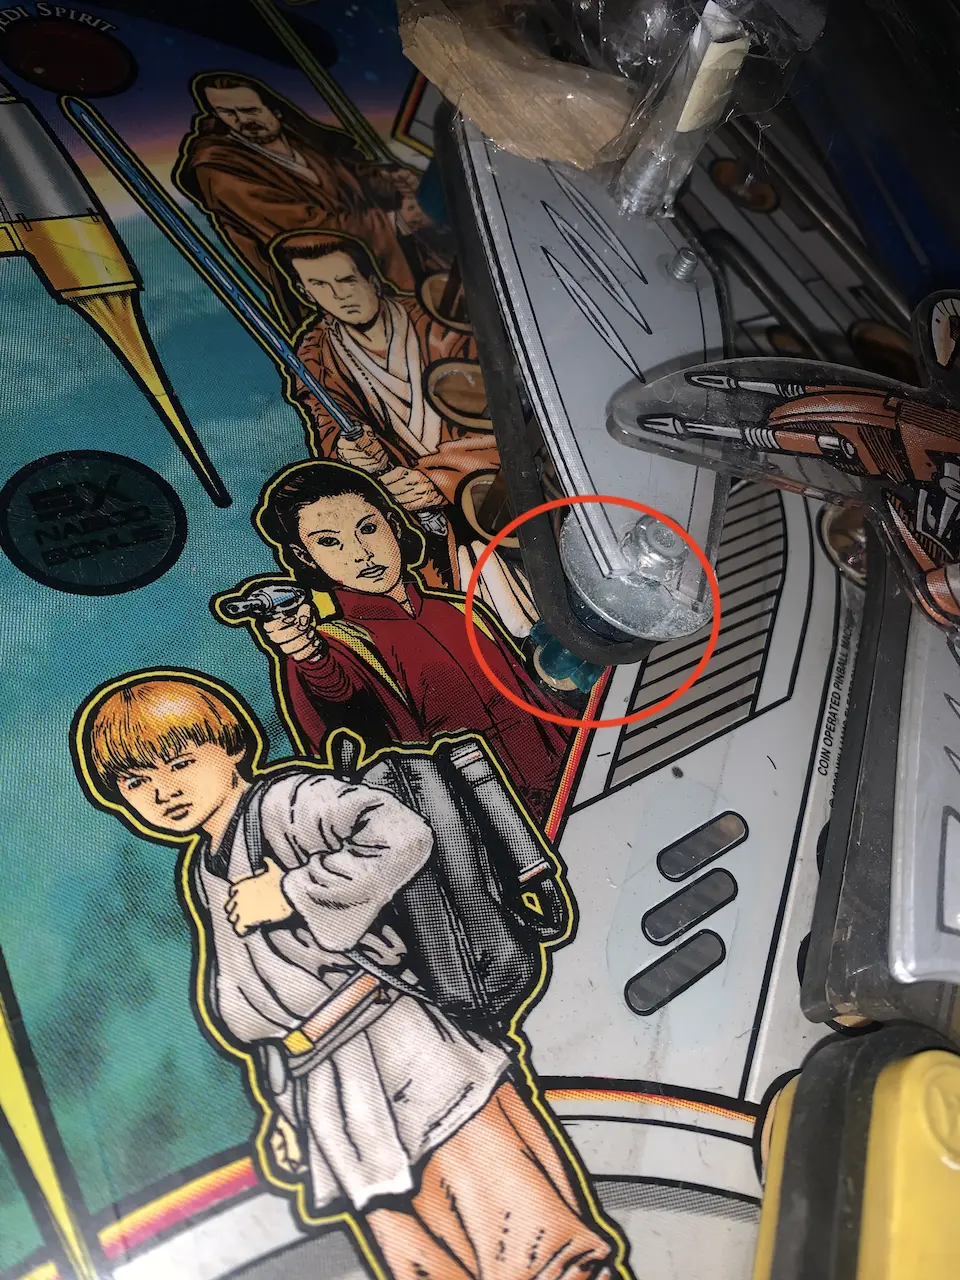
However, when we look at the left bumper we can see that the blue pillar at the bottom is significantly different. It has a triangular piece of plastic that essentially holds the elastic band in place.
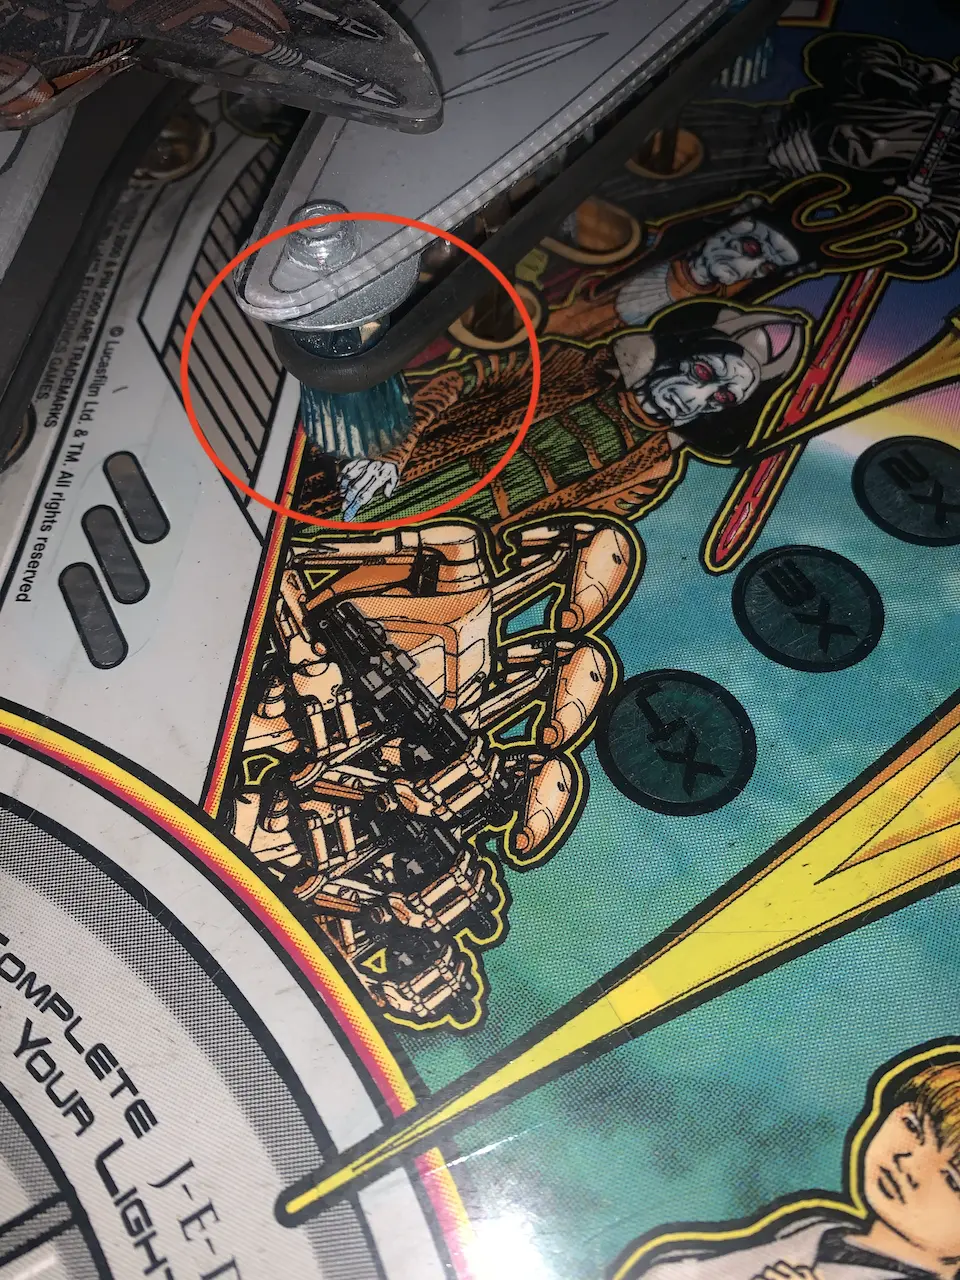
Since this piece is missing on the right side, the elastic band would be pushed down from it's intended position as the selenoid fired. Eventually, the elastic would be pushed far enough down that it could no longer actuate the switch at all.
So the solution is that I need to hold that elastic band in place somehow. It's possible this is a common part that can be ordered online, but until I find that, i'll use poster putty to hold the elastic in place.
The bumper is now working again, which is great, but I still need to fix those broken wires. The fact that the game seems to work perfectly leads me to believe that these wires are not critical to the operation of the machine. so I wrapped them in electrical tape and left them for another day.
Now it's finally time to start trying to achieve some high scores!